Still Life Drawing
Objectives:
- Visual Art: The students will create a series of still life drawing using proportion and shape. Then they will demonstrate value and form through shading.
- Literacy: Students will write a goal and reflect and then evaluate growth of skills.
|
Step 1. Understanding Arrangements
Step 2: Time to draw and practice reflecting. Visit page!
|
Step 5: Multimedia Still LifeOverview: Original blog site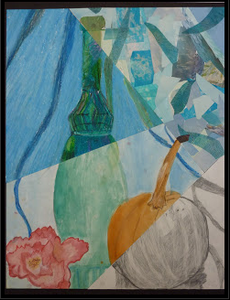
Objective:
7th graders will learn about and practice using several different artistic mediums in this one project.
|
|
|
Materials:
#2 Drawing Pencils - Ebony Pencils
Paper towels - Tortillons - Newsprint
Good Drawing Paper 80#
Kneaded Rubber Erasers
Graphite Sticks 6B
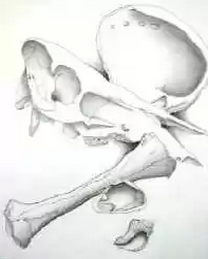
Objects for drawing (shells and bones were used)
#2 Drawing Pencils - Ebony Pencils
Paper towels - Tortillons - Newsprint
Good Drawing Paper 80#
Kneaded Rubber Erasers
Graphite Sticks 6B
Objects for drawing (shells and bones were used)
Objectives: Students will
- Develop skills in observational drawing - draw from life - Create interesting composition using overlapping - create eye movement through use of lights and darks.
- Develop skills in shading - use a variety of tools.
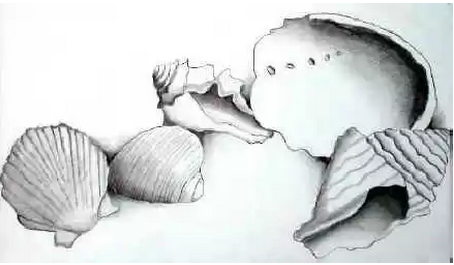
- Show a full range of values from black to very light - Show five principles of shading: Highlight, shade, shadow, reflected light and back shading.
Instruction/Motivation:
(Complete instructions and student samples may be found in Ken Schwab's book "Drawing Course 101" - from Sterling Publications, NY).
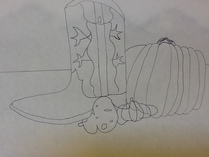
1. Select subject matter for the drawing, shells bones, simple objects that will have good form and maybe some texture.
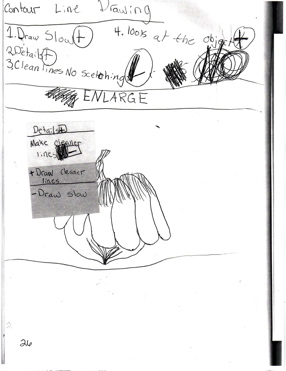
2. Make at least 5 contour studies of several objects in different sizes on Newsprint 5" to 10 " (12.7 to 25.4 cm) long.
3. Cut around the sketches closely with a pair of scissors.
4. On a larger piece of newsprint, arrange the sketches to create an area of emphasis and directional movement. Overlapping the sketches and placing them so that they create a triangular movement. Using good 80 lb Drawing Paper, use graphite on the back and transfer the images to the paper leaving only a light line.
5. Demonstrate how to make a gradation. Have them practice. (From Judy: Students will work on line quality - vary thickness and pressure of line.)
6. Show the 5 principles of shading. Highlight, shade, shadow, reflected light and back shading. Have them create an imaginary source of light. (From Judy: Develop some strong contrast.)
Critique the work in progress and at the end.
Evaluation:
- Review principles of shading: Highlight, shade, shadow, reflected light and back shading.
- Demonstrate shading techniques - various effects that can be made with tools.
(Complete instructions and student samples may be found in Ken Schwab's book "Drawing Course 101" - from Sterling Publications, NY).
1. Select subject matter for the drawing, shells bones, simple objects that will have good form and maybe some texture.
2. Make at least 5 contour studies of several objects in different sizes on Newsprint 5" to 10 " (12.7 to 25.4 cm) long.
3. Cut around the sketches closely with a pair of scissors.
4. On a larger piece of newsprint, arrange the sketches to create an area of emphasis and directional movement. Overlapping the sketches and placing them so that they create a triangular movement. Using good 80 lb Drawing Paper, use graphite on the back and transfer the images to the paper leaving only a light line.
5. Demonstrate how to make a gradation. Have them practice. (From Judy: Students will work on line quality - vary thickness and pressure of line.)
6. Show the 5 principles of shading. Highlight, shade, shadow, reflected light and back shading. Have them create an imaginary source of light. (From Judy: Develop some strong contrast.)
Critique the work in progress and at the end.
Evaluation:
- Did students create an interesting composition using overlapping - show skills in observational drawing?
- Did students use tools to show a full range of values? Vary line quality -thickness/value? Show the five principles of shading (Highlight, shade, shadow, reflected light and back shading)?
Extension:
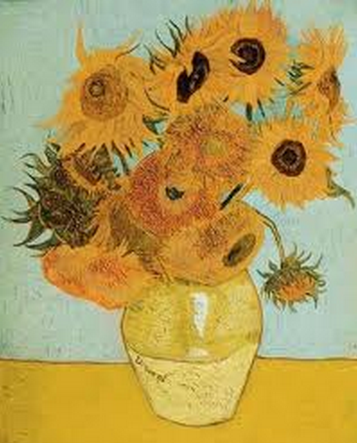
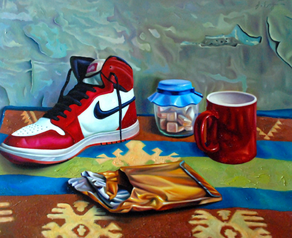
View the items below: Discuss and comment using the questions provided.
1. Which subjects (items) would you like to hang on your wall? Why?
2. Discuss the height, size, and color variety of each picture.
View the items below: Discuss and comment using the questions provided.
1. Which subjects (items) would you like to hang on your wall? Why?
2. Discuss the height, size, and color variety of each picture.
- Which one appeals to you more? Why?
- What items would you bring in to draw? Why?
|

|
|
