Nature Prints
Objective: Students will create various prints off of their nature inspired press board.
Step 1: Fold paper and brainstorm items from nature. video
Size: Items should be small enough to fit in your hand.
Step 2: Draw 2 items filling the space provided. You may add a few details but no background.
Step 3: Choose your best drawing to show the teacher. Your design must fit the requirements for size, space, and detail.
Step 4: Transferring your Design: video
Materials needed: drawing, press board, popsicle stick
Step 5: Retrace your press board. Video - 5&6
You must retrace your design to make it more defined. If it is not deep enough, the ink will not print your design.
Step 6: Pressing the background down: Video 6 closer up
1. Using a large popsicle stick, press the entire background down.
Step 7: Create a pattern in the background. Video
Use another popsicle stick to create waves, stripes, diagonals, etc.
Step 8: Press your nature item one more time. (pointed popsicle stick)
Step 9: Write your name and class on back.
-Place on table number when done.
When complete:
1.Finish a project you are not done with.
2.Free draw on your portfolio.
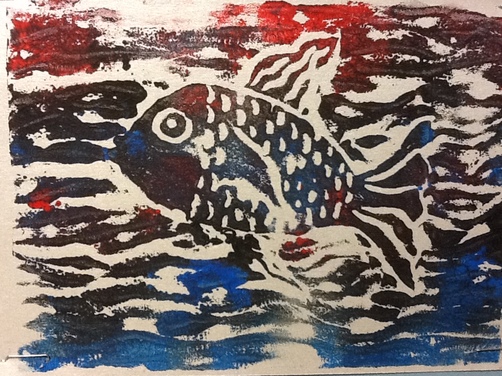
Final Step: Create your Print!!!!
Step 10: Printing - Wash your press board to print on day 2 (see video).
1. Gather materials: art shirt (bring from locker - have on when entering class), newspaper, roller, plate with ink, press board, final paper
2.Watch Demonstration from Mrs. Christensen!
a. Write name on two papers (back).
- Position board and paper that you will be printing on to (not under where your roll)
b. Roll ink onto board quickly and pass - take turns
-Be sure to not have to much ink or to little. It will be trial and error!!!
-Listen for the sticky sound.
c. Turn board over and press all over.
d. Remove board and look at your masterpiece!!!
e. Bring your print to the back room to dry.
f. Repeat a-f - 3 more times. g. Wash your press board. - video
h. Clean up your individual mess (keep your art shirt on).
* When finished, you may...
1. Free draw on free paper.
3. Clean up:
a. Take care of your job: newspaper, roller, plate with ink, press board, final paper - Listen to Mrs. C!
b. Wash off any ink on the table with a wet paper towel.
c. Wash hands
d. Take off art shirts
4. Last Printing- Video
Printmaking Evaluation
Construction:
|
Appearance:
|
Originality:
|
Printmaking Evaluation
Project Name: Printmaking
What do you like? (strength)
What could be improved? (What should you have done differently?)
- Did you draw your design big enough to use your 4x5 rectangle space well?
- Did you transfer your design so it was in the center of the board? (not- off center)
- Did you retrace your design so your nature item would show up on your print?
- Did you create background pattern?
- Did you retrace your design one final time so it would be deep enough?
- How does the print look? (no finger prints, should look clean and neat)
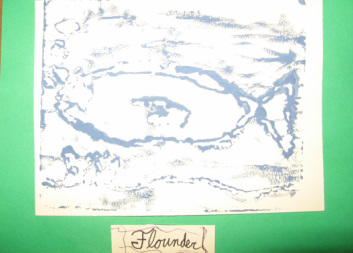
- Can you see your nature item? (not like a blob)
- Does your background pattern look interesting with your item? (not messy and unorganized)
What do you like? (strength)
What could be improved? (What should you have done differently?)
Print Presentation
- Decisions:
-Color of Paper? If it needs to be cut, bring to Mrs. C.
-Direction? Can be presented horizontal or vertical.
2. Glue: located by pencils (please use a glue paper)
3. Title: Think of a creative title. (read the title to the left)
-Use best handwriting.
-Best spelling.
-Centered on construction paper.
-If glued on black paper, see Mrs. C.
-If on large paper, write title on print.
4. Write name and class on back.
5. Turn in to Mrs. C.
