Cross-Hatch Tree
Objective: The students will create a tree silhouette design using three cross-hatch values. (NVAS.1 & 2)
|
Part B: Practice
Step 2: Practice Paper: Practice shading the value scale.
Step 4: Practice Paper: Practice Drawing the Tree (pencil). Use the rule of thirds! Begin the video at 4:02. Show Mrs. C!
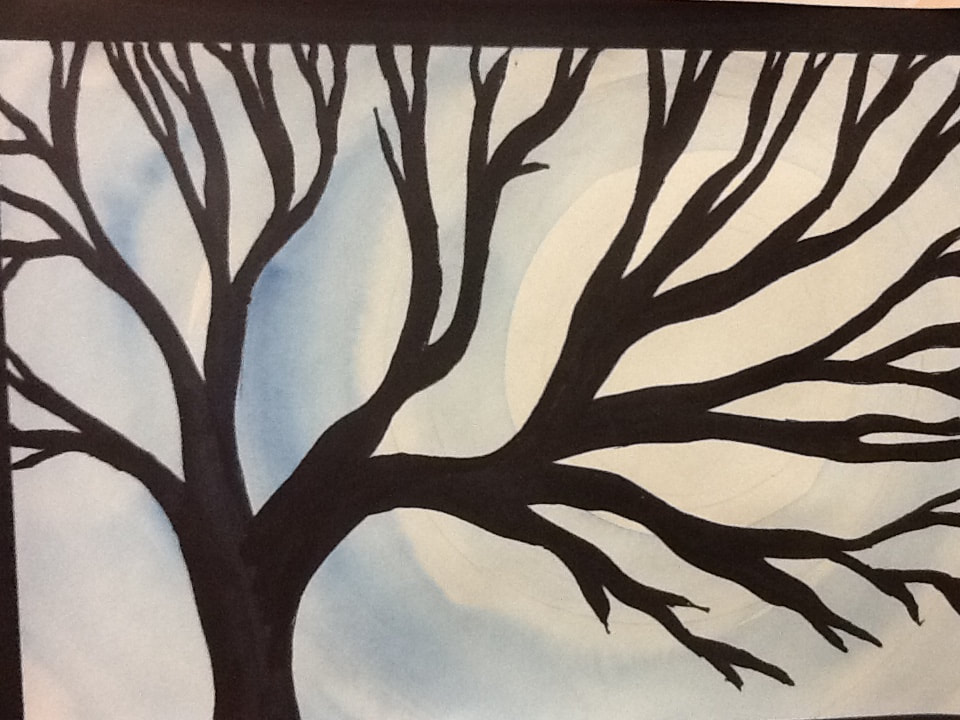
Step 5: Final Paper: Draw your final Tree on the watercolor paper (pencil). Show Mrs. C!
Step 2: Practice Paper: Practice shading the value scale.
- Extra Credit: Cone and Sphere (Scroll down to find the short videos.)
Step 4: Practice Paper: Practice Drawing the Tree (pencil). Use the rule of thirds! Begin the video at 4:02. Show Mrs. C!
Step 5: Final Paper: Draw your final Tree on the watercolor paper (pencil). Show Mrs. C!
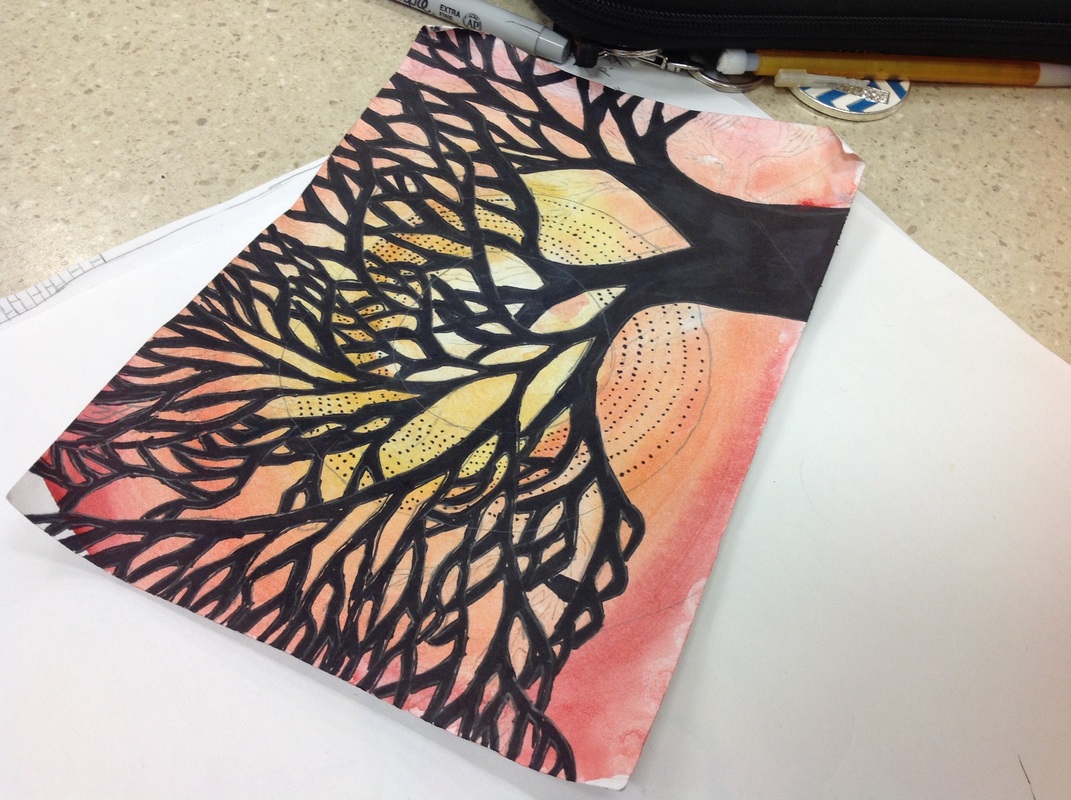
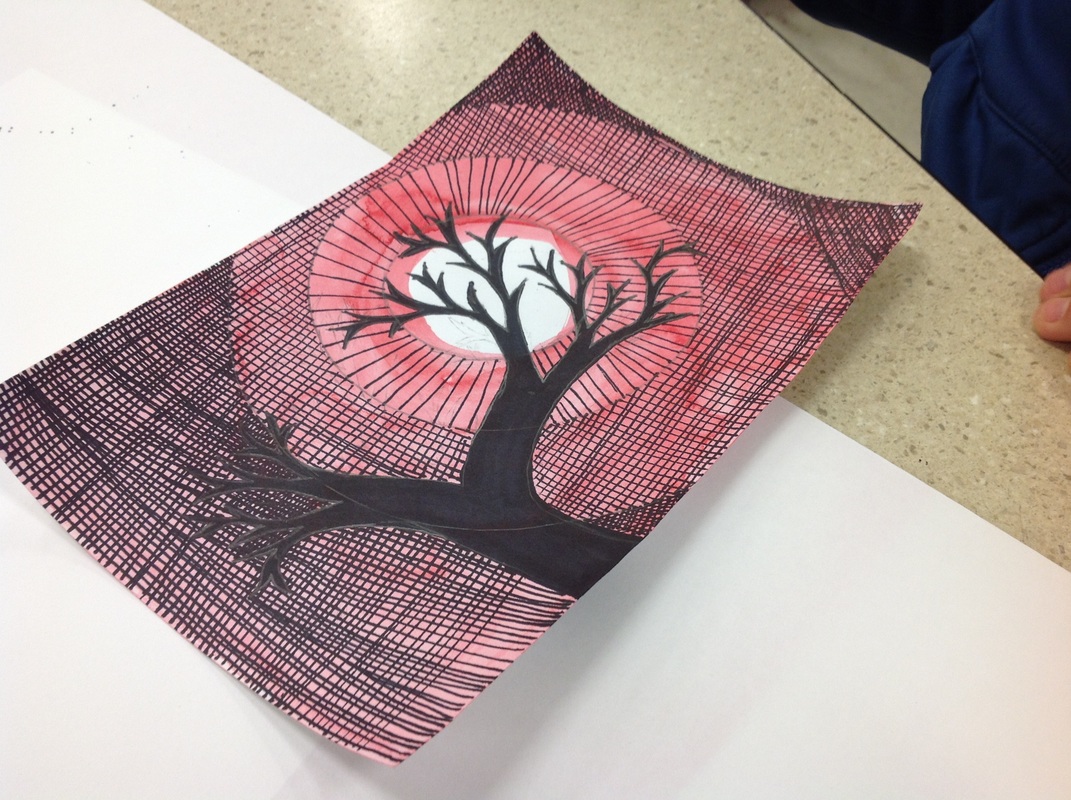
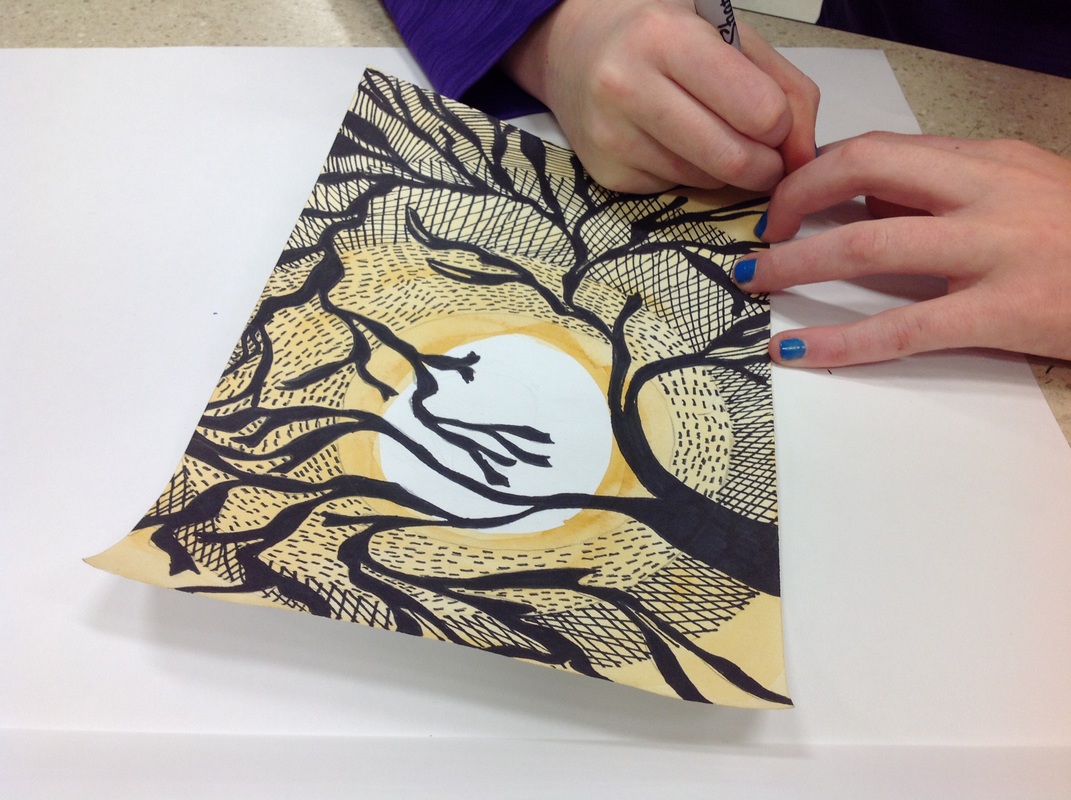
- Show Mrs. C to get a sharpie and fill in the tree.


Part C: Practice and Analyzing/Evaluating
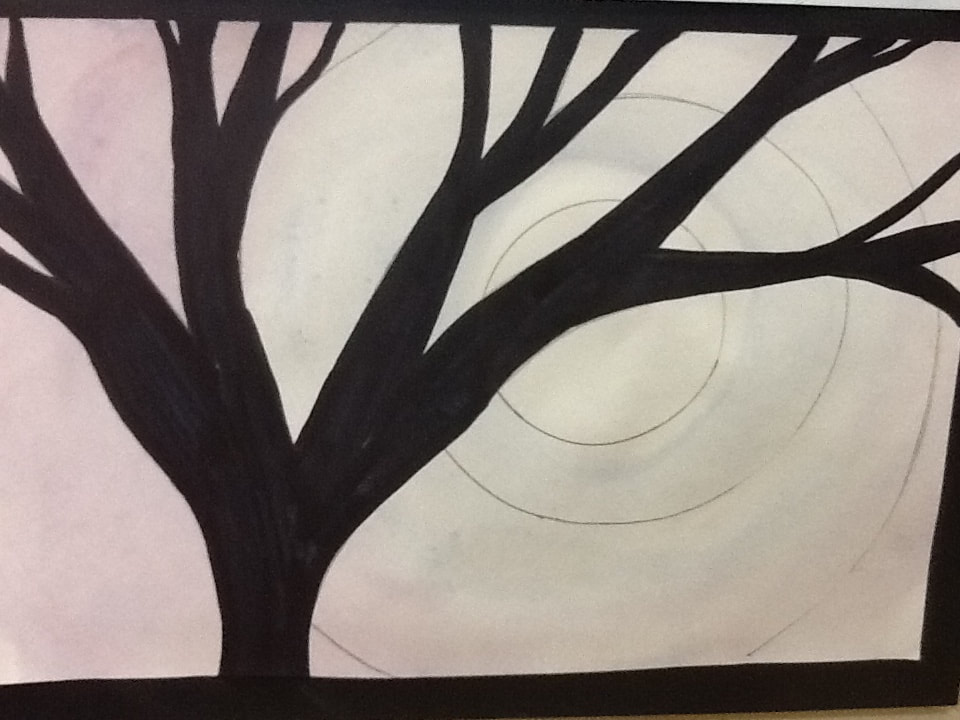
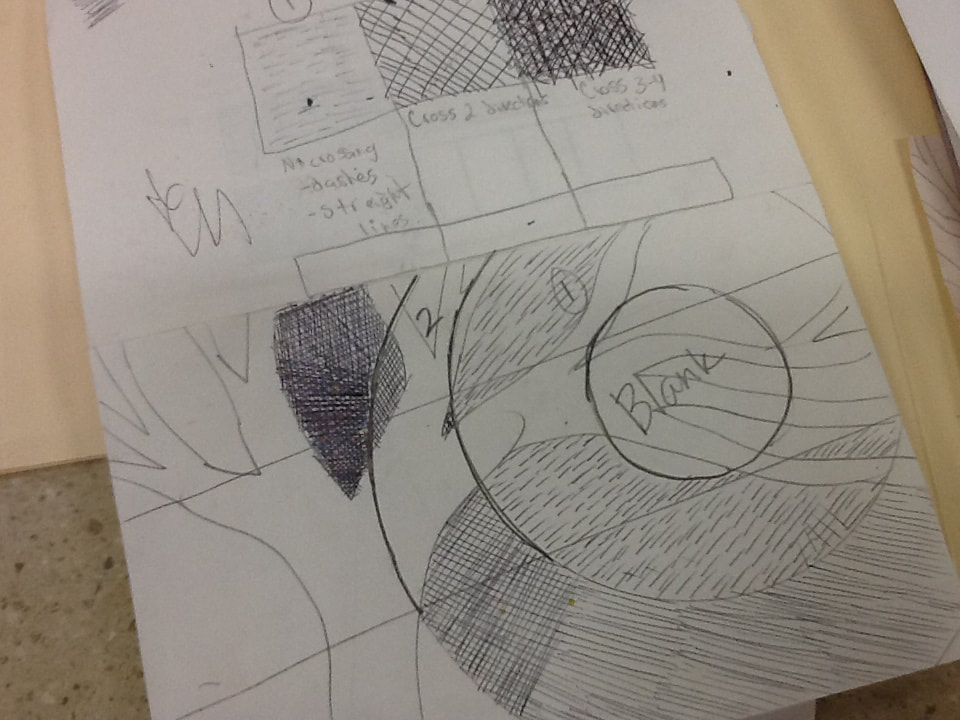
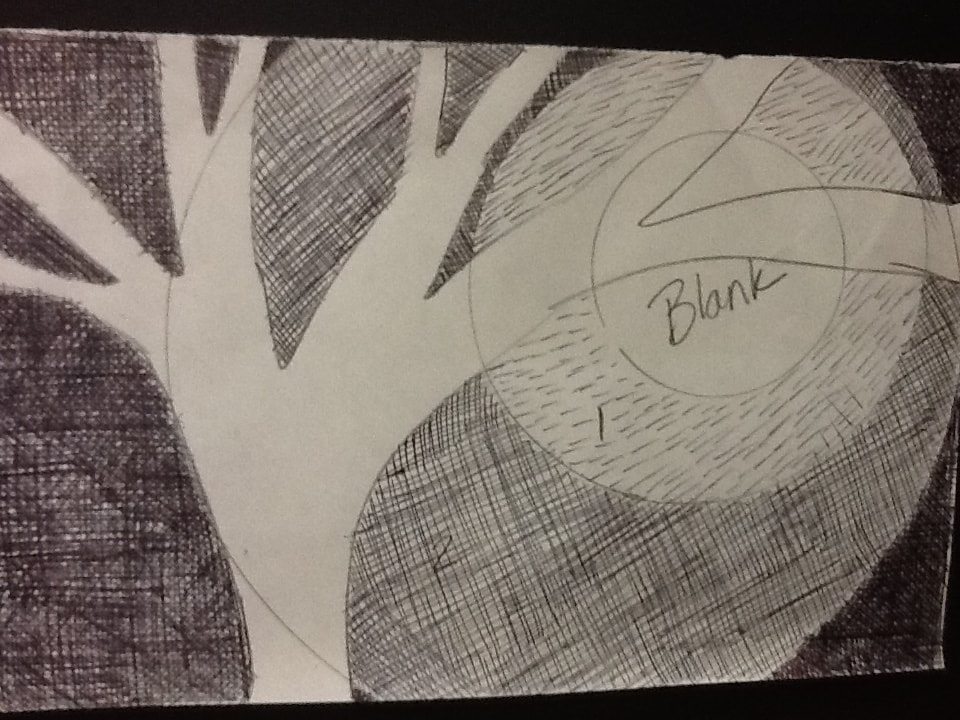
Step 6: Final Paper: Trace circles (The smallest circle: The white circle you left blank when painting. Make sure the rest are off center.)
- video
Step 7: Practice Paper: Draw the circles on your practice paper in pencil. (In the same place as the final.)
-Show Mrs. C your final and practice with the circles in pencil.
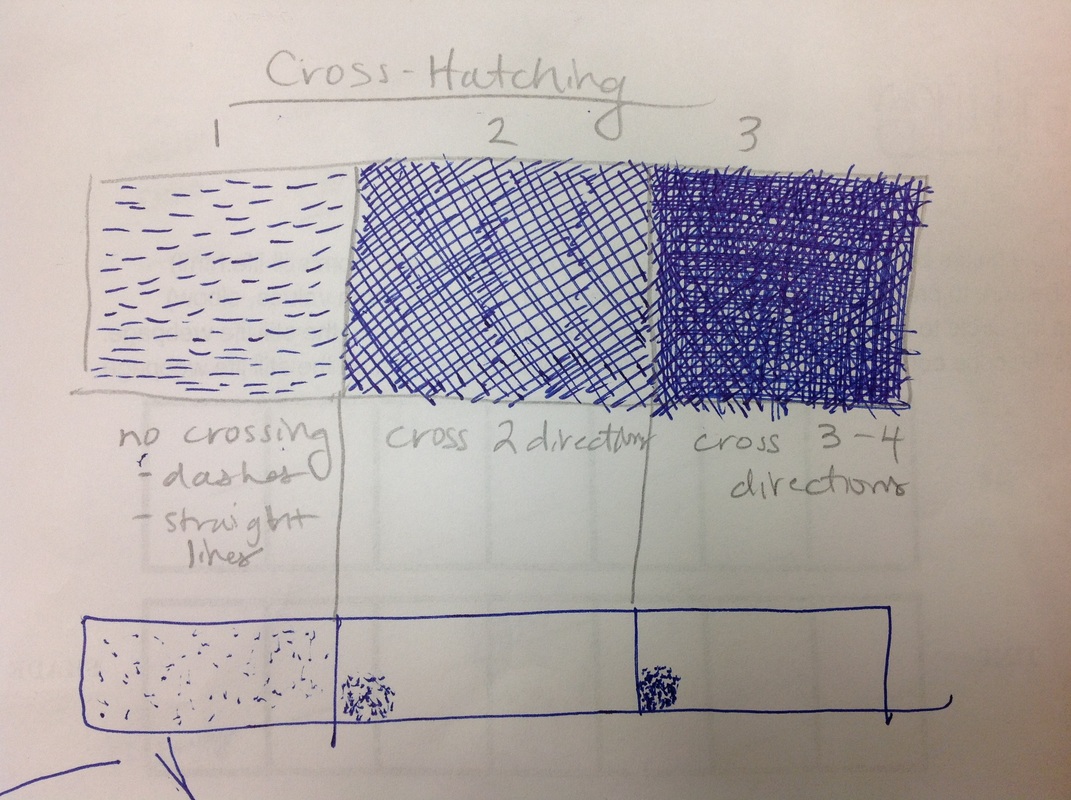
Step 8: Practice Paper: Practice cross-hatching in pen on the practice tree (label and begin) - video
Step 6: Final Paper: Trace circles (The smallest circle: The white circle you left blank when painting. Make sure the rest are off center.)
- video
Step 7: Practice Paper: Draw the circles on your practice paper in pencil. (In the same place as the final.)
-Show Mrs. C your final and practice with the circles in pencil.
Step 8: Practice Paper: Practice cross-hatching in pen on the practice tree (label and begin) - video
- Show Mrs. C.

Part D: Begin Final Project
Step 9: Final Paper: Begin your cross-hatching on your final. Use a pen if you have one at home! Be sure you are following your practice and can see a different in the three different values.
Part E: Analyze
Step 10: Partners: Ask a partner to view your values.
Step 11: Animals: Practice paper - Draw an animal outline in pencil. Then show Mrs. C.
Step 12: Show Mrs. C
Step 9: Final Paper: Begin your cross-hatching on your final. Use a pen if you have one at home! Be sure you are following your practice and can see a different in the three different values.
Part E: Analyze
Step 10: Partners: Ask a partner to view your values.
- Do the values look different?
- Value 1- Is it light enough? Is it different than value 2?
- Value 2- Are you crossing 1 time? Does it look like the medium value between 1 and 2?
- Value 3- Have you crossed your lines enough times that it is the darkest value? Is it lighter than the tree?
- Do your values look even? Does it have open spots?
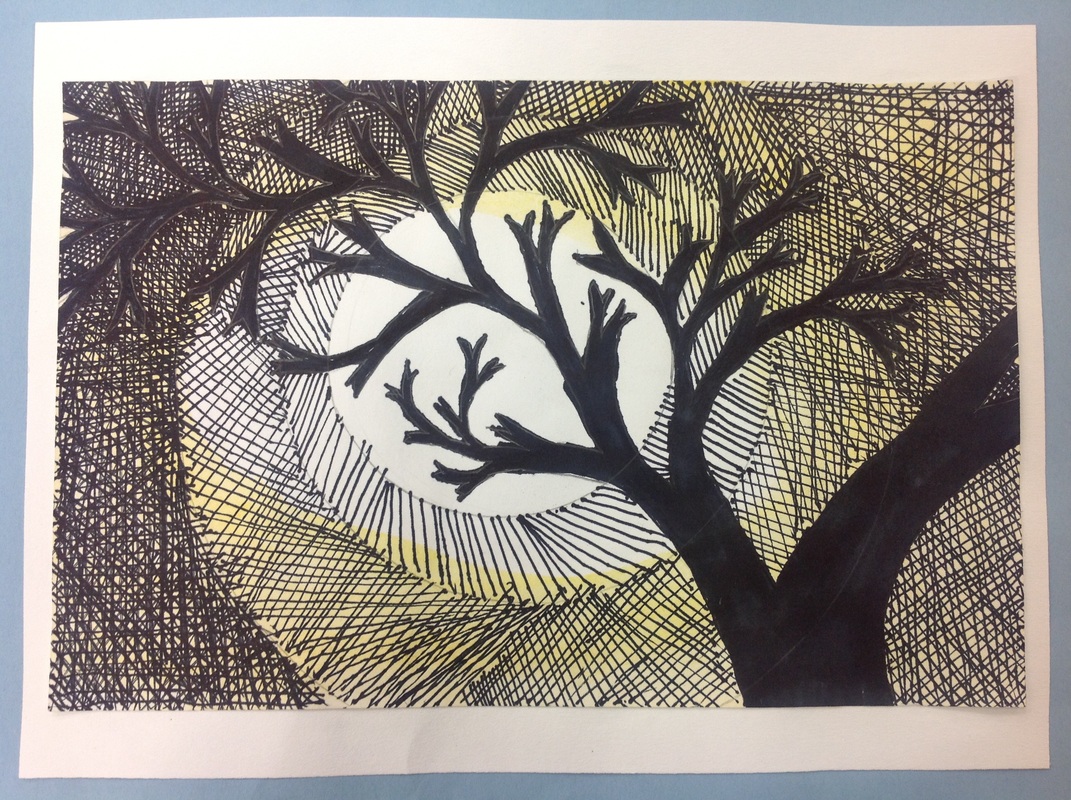
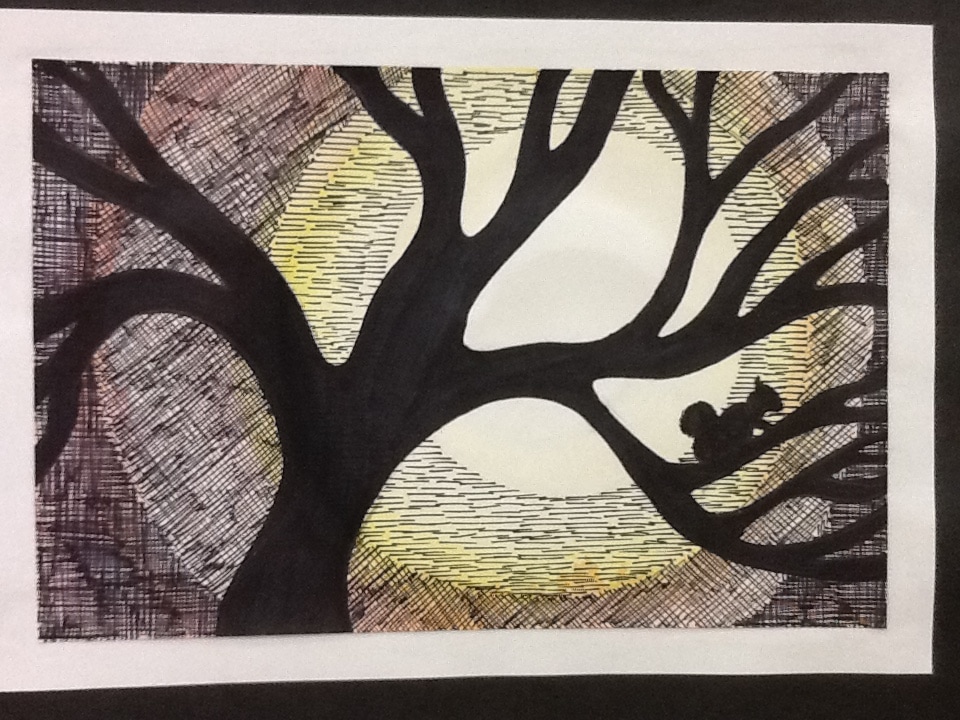
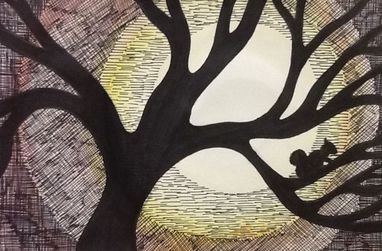
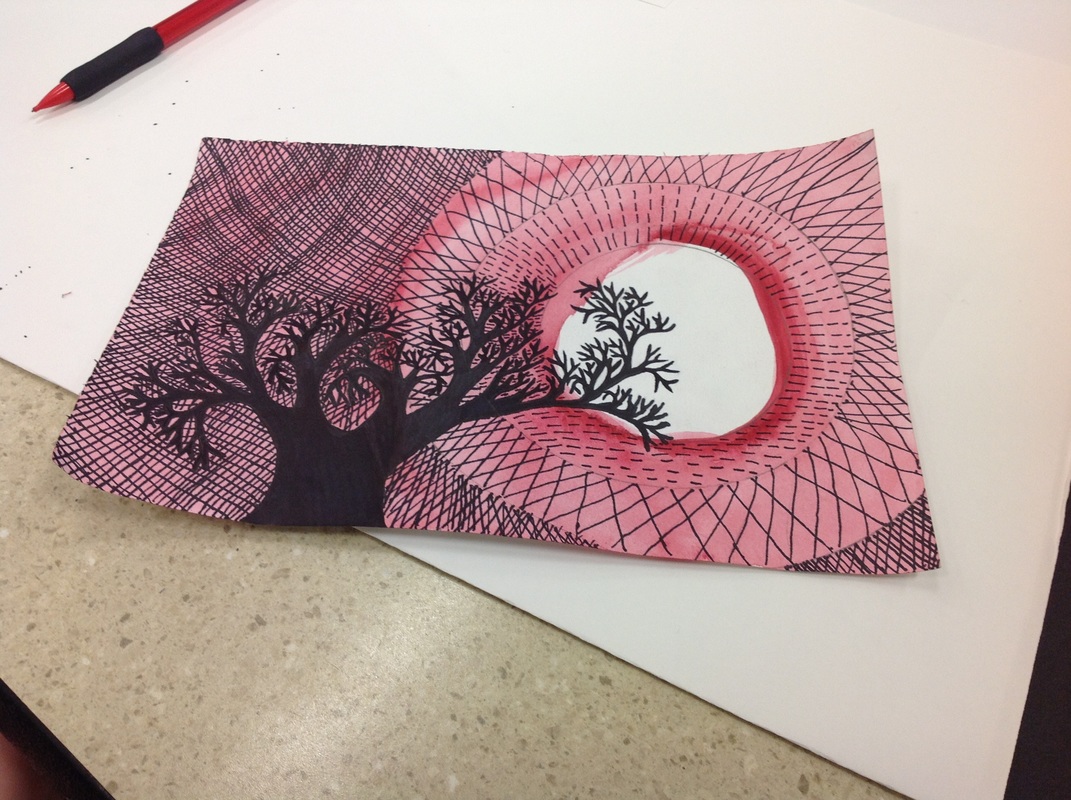
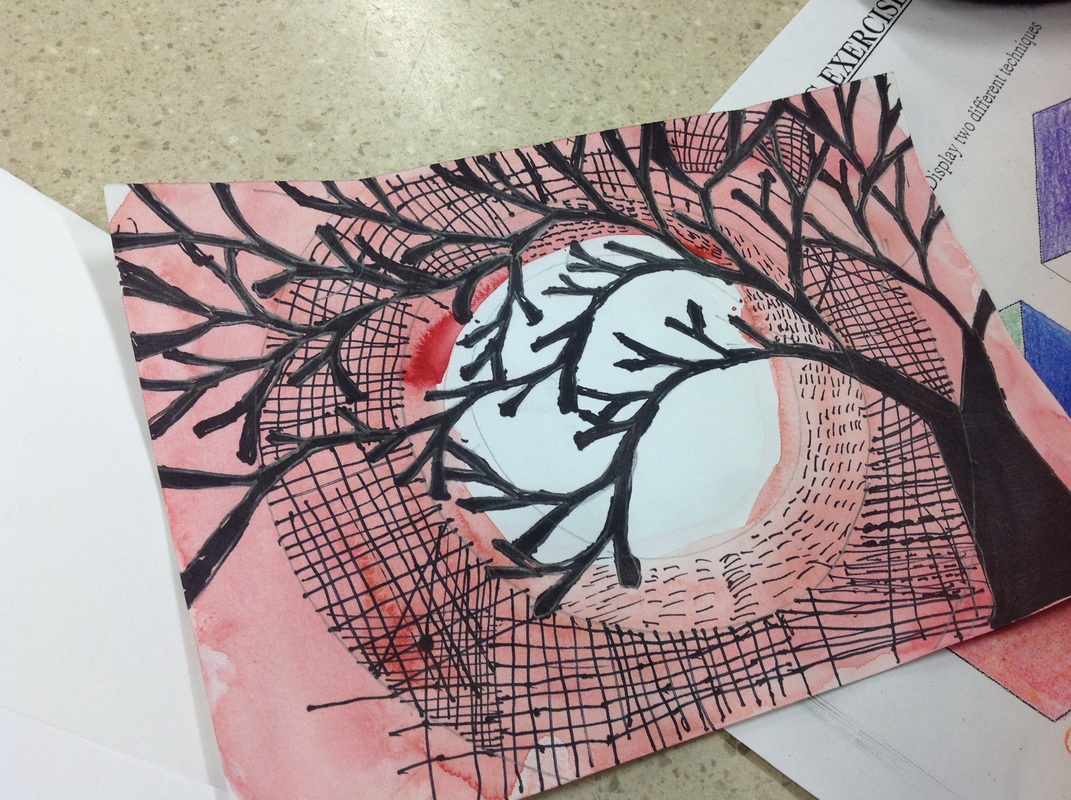
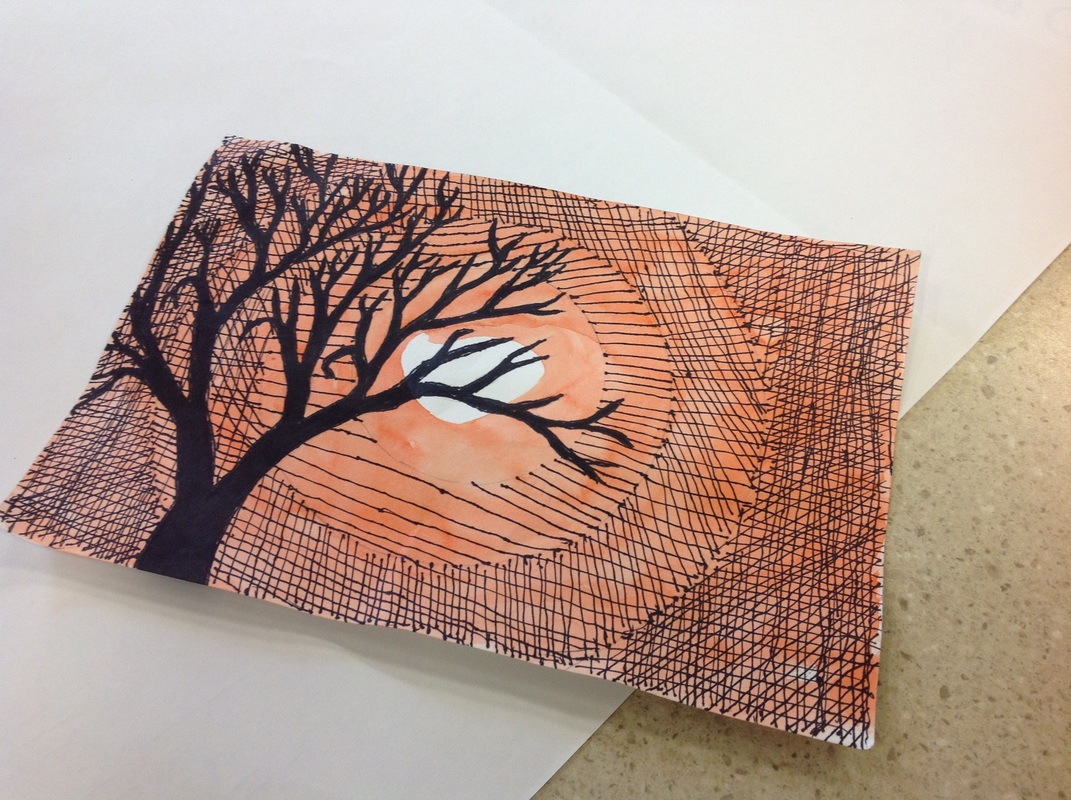
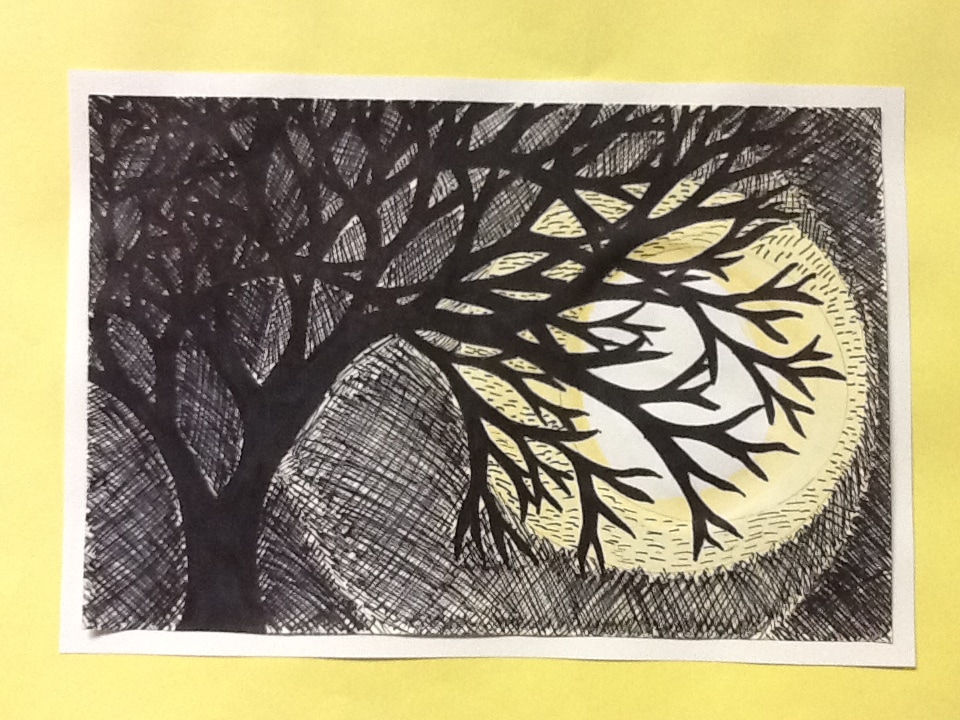
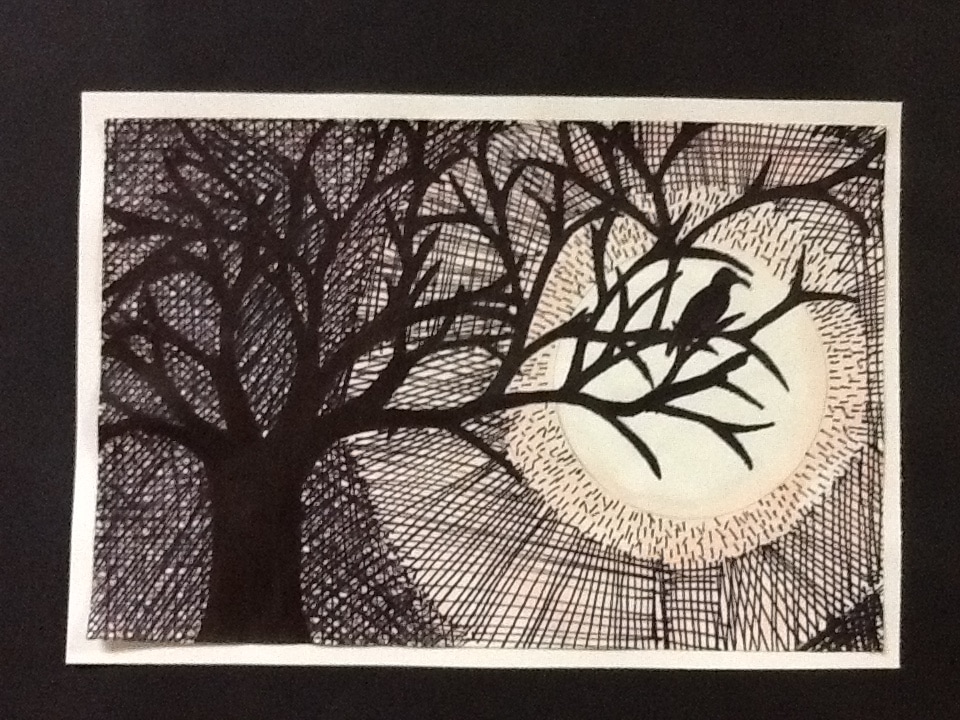
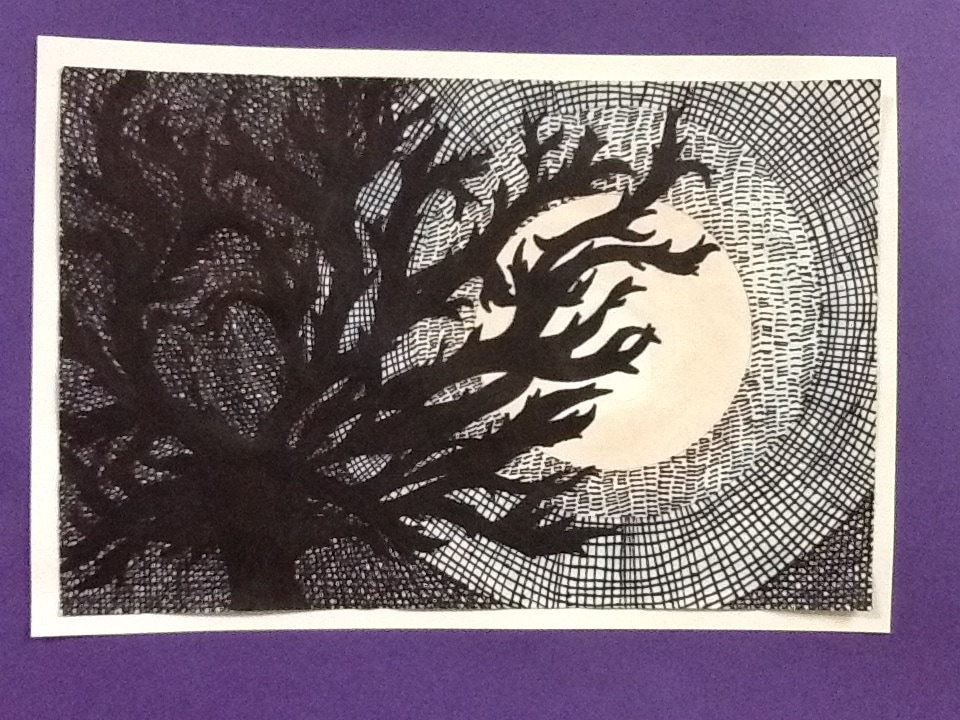
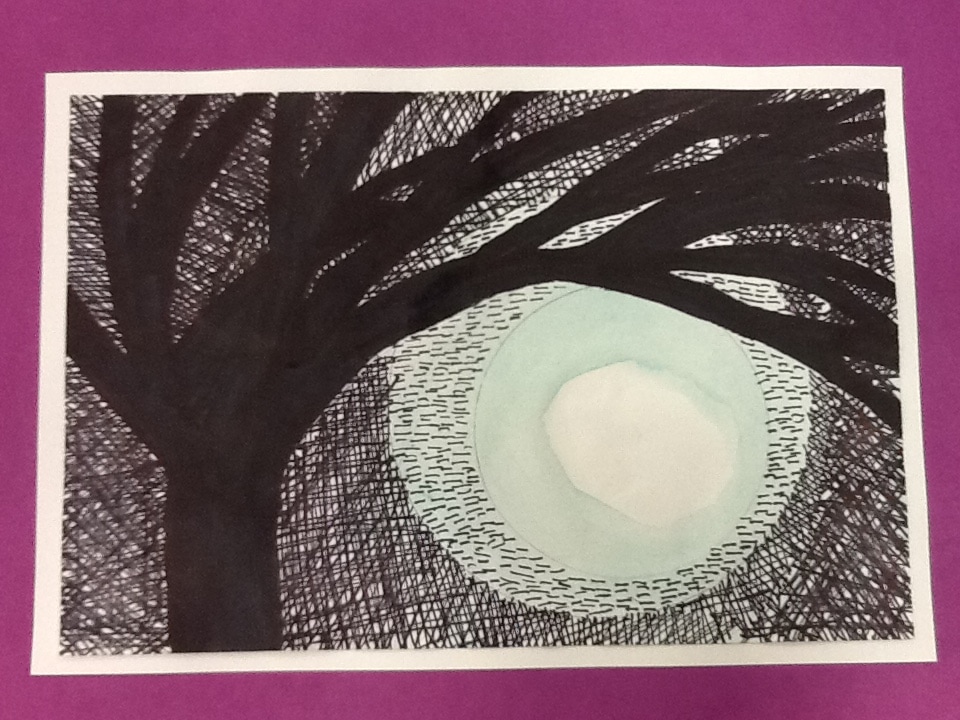
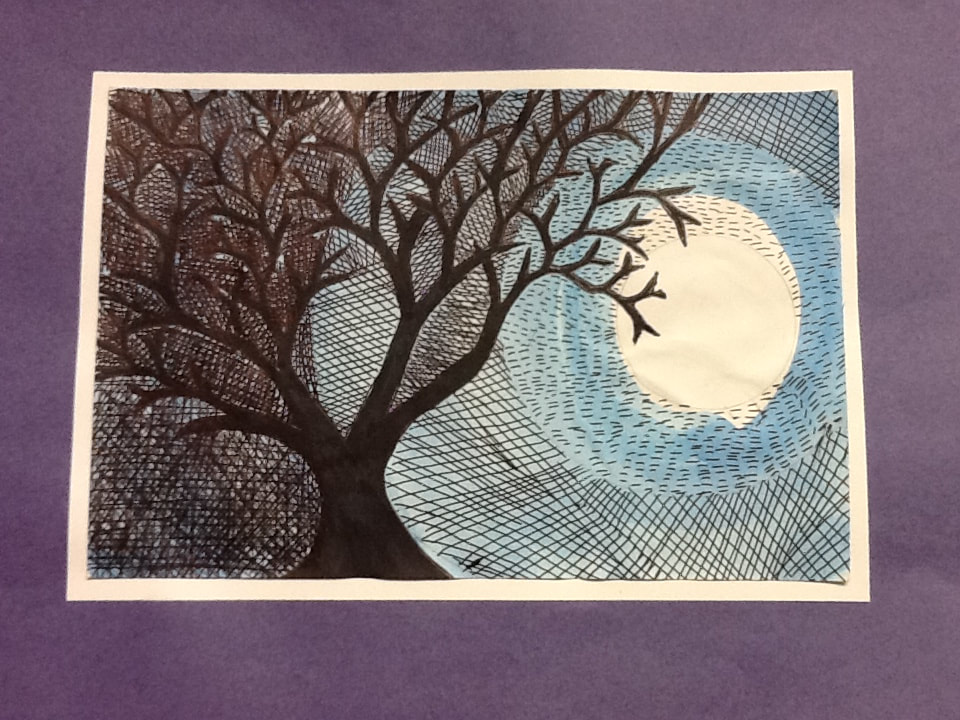
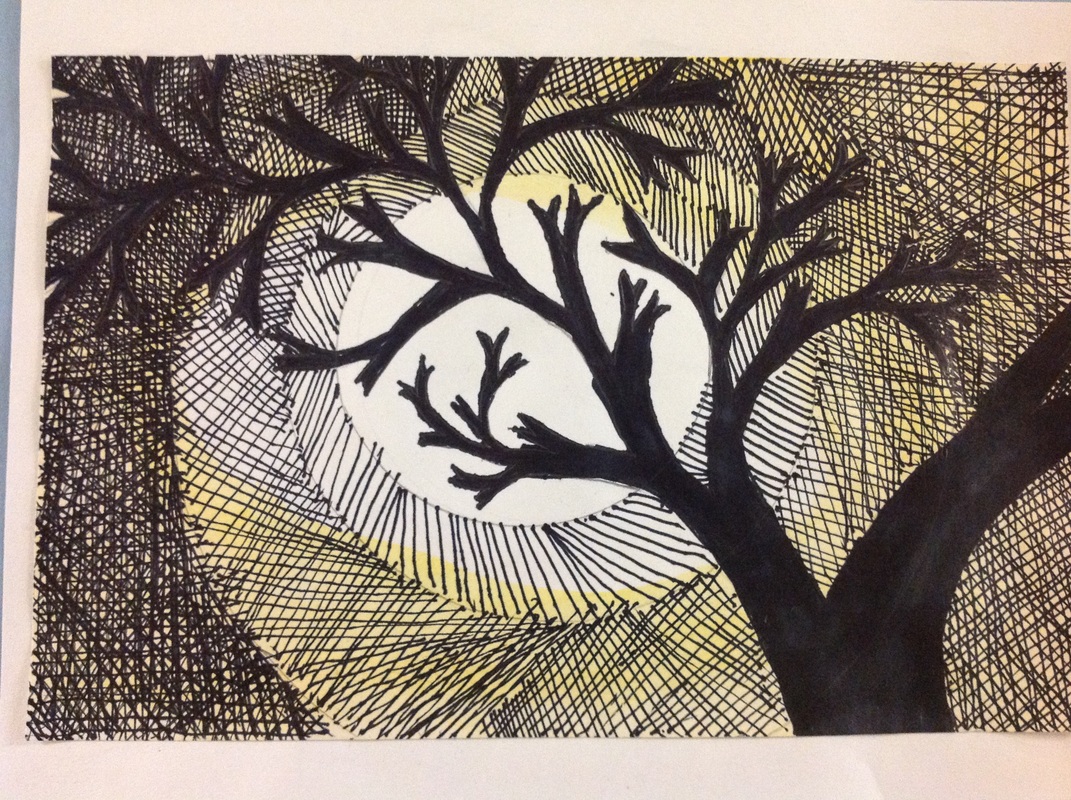
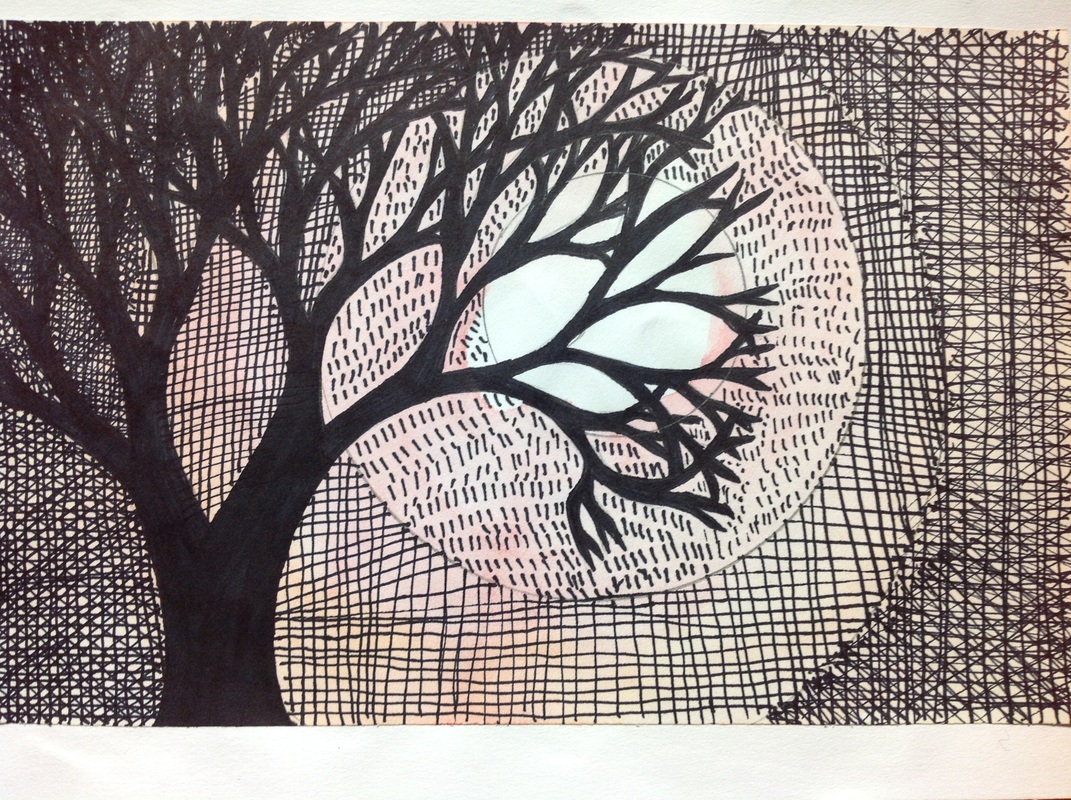
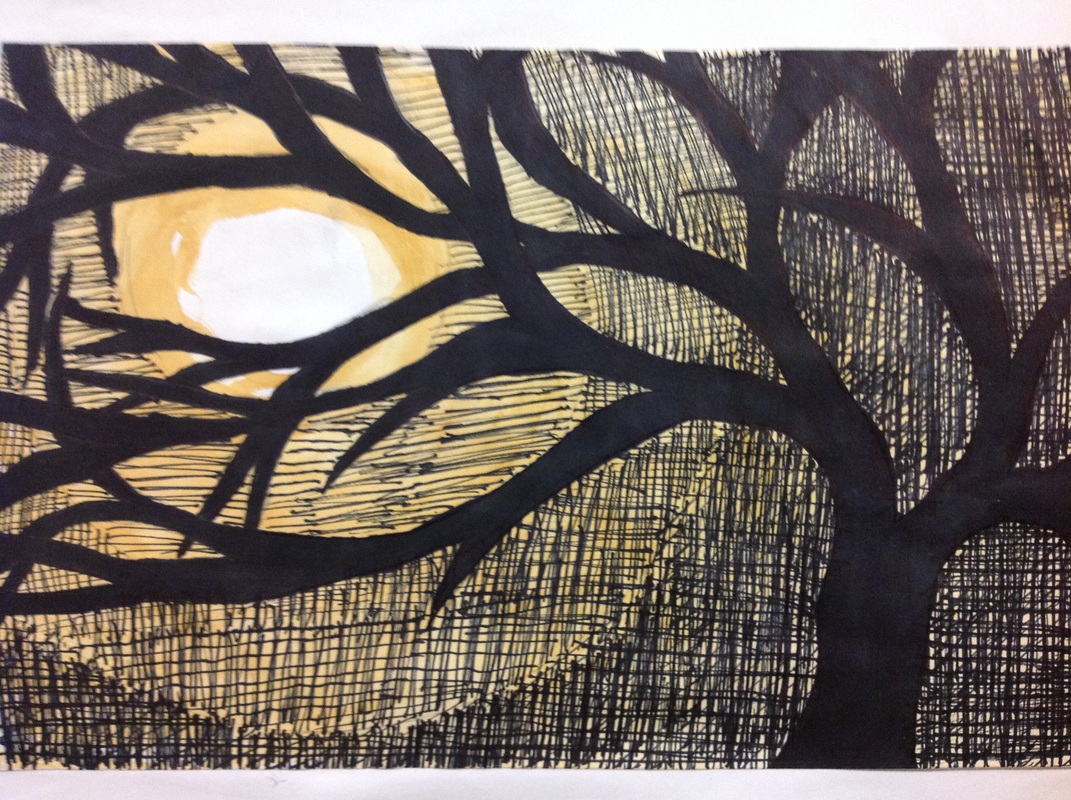
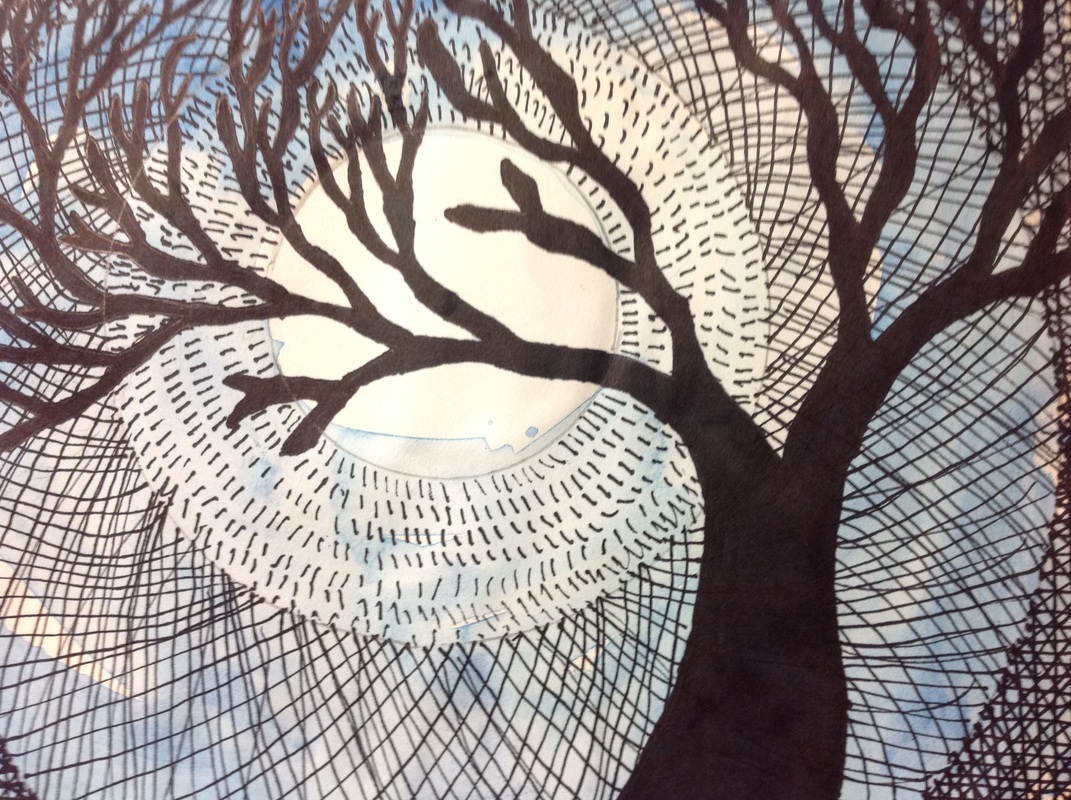
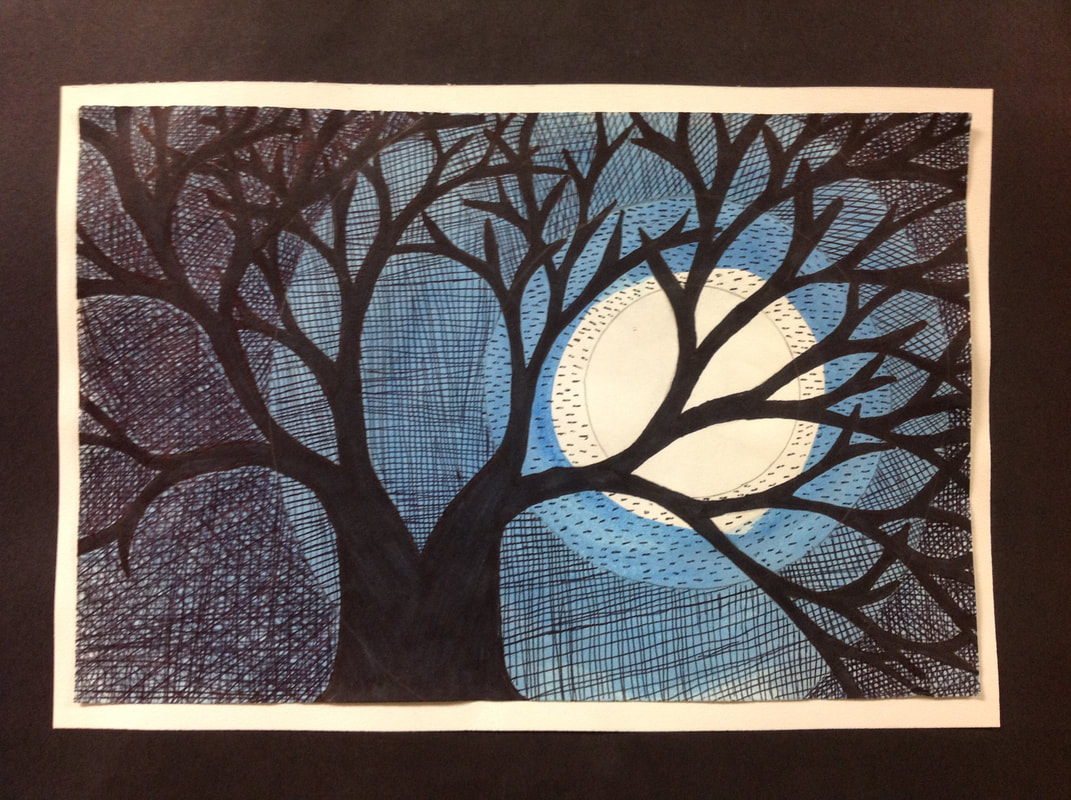
- There should be 5 present values: Moon or sun (blank), Value 1 (dashes), value 2 (cross 1 time), value 3 (cross multipule times), Tree (completely black)
Step 11: Animals: Practice paper - Draw an animal outline in pencil. Then show Mrs. C.
- Create an animal for extra creativity. (What type of season or time of day is your tree in? Did you capture a specific feeling or mood? What type of animal might fit your project best?)
Step 12: Show Mrs. C
|
Step 9
|
Step 10
|


Part F: Final Evaluation and Analyzing
Step 14: Take photo and save!
Step 15: Canvas: Google Doc. Upload to Canvas: Cross-Hatch Tree: Final Step 16: Chart - Final Self-Evaluation: Analyze your project!
Step 14: Take photo and save!
Step 15: Canvas: Google Doc. Upload to Canvas: Cross-Hatch Tree: Final Step 16: Chart - Final Self-Evaluation: Analyze your project!
Part G: Presentation -
Step 16: Select a construction paper for your background.
Step 17: Place project, evaluation chart, and construction paper on Mrs. C's desk.
Mrs. C will glue your project!
Step 16: Select a construction paper for your background.
Step 17: Place project, evaluation chart, and construction paper on Mrs. C's desk.
Mrs. C will glue your project!
|
|
|